这里主要使用工具为:AWS Serverless Application Model(sam)
https://docs.aws.amazon.com/serverless-application-model/latest/developerguide/what-is-sam.html
1. 安装sam
安装docker
安装brew
安装sam-cli
2. 部署一个HelloWorld程序
执行
sam init命令进行项目初始化$ sam init # 选择模板源 Which template source would you like to use? 1 - AWS Quick Start Templates # aws 2 - Custom Template Location # 自定义 Choice: 1 # 选择运行时环境 Which runtime would you like to use? 1 - nodejs12.x 2 - python3.8 3 - ruby2.5 4 - go1.x 5 - java11 6 - dotnetcore2.1 7 - nodejs10.x 8 - nodejs8.10 9 - nodejs6.10 10 - python3.7 11 - python3.6 12 - python2.7 13 - java8 14 - dotnetcore2.0 15 - dotnetcore1.0 Runtime: 7 # 项目名称 Project name [sam-app]: # 是否更新 Quick start templates may have been updated. Do you want to re-download the latest [Y/n]: Y AWS quick start application templates: 1 - Hello World Example 2 - Quick Start: From Scratch 3 - Quick Start: Scheduled Events 4 - Quick Start: S3 5 - Quick Start: SNS 6 - Quick Start: SQS 7 - Quick Start: Web Backend Template selection: 1 ----------------------- Generating application: ----------------------- Name: sam-app Runtime: nodejs10.x Dependency Manager: npm Application Template: hello-world Output Directory: . Next steps can be found in the README file at ./sam-app/README.md
到此, 项目已经生成完毕。
具体目录结构如下: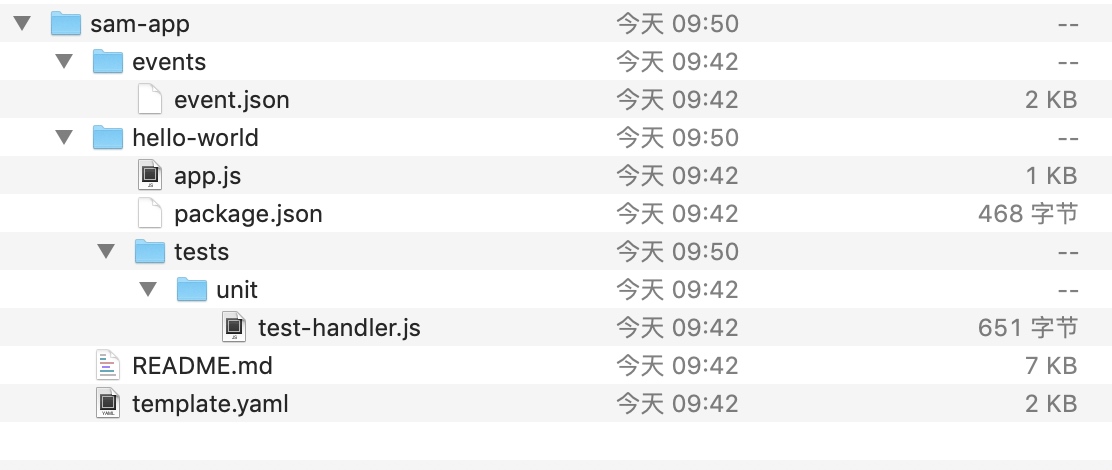
启动并测试
#启动项目
$ sam local start-api
Mounting HelloWorldFunction at http://127.0.0.1:3000/hello [GET]
    You can now browse to the above endpoints to invoke your functions. You do not need to restart/reload SAM CLI while working on your functions, changes will be reflected instantly/automatically. You only need to restart SAM CLI if you update your AWS SAM template
    2020-04-04 10:12:48  * Running on http://127.0.0.1:3000/ (Press CTRL+C to quit)
# 测试
$ curl localhost:3000/hello
{"message":"hello world"}
3. 使用IDE进行本地调试
这里我们使用VS Code.
首先使用VS Code 打开刚创建的项目, 如图: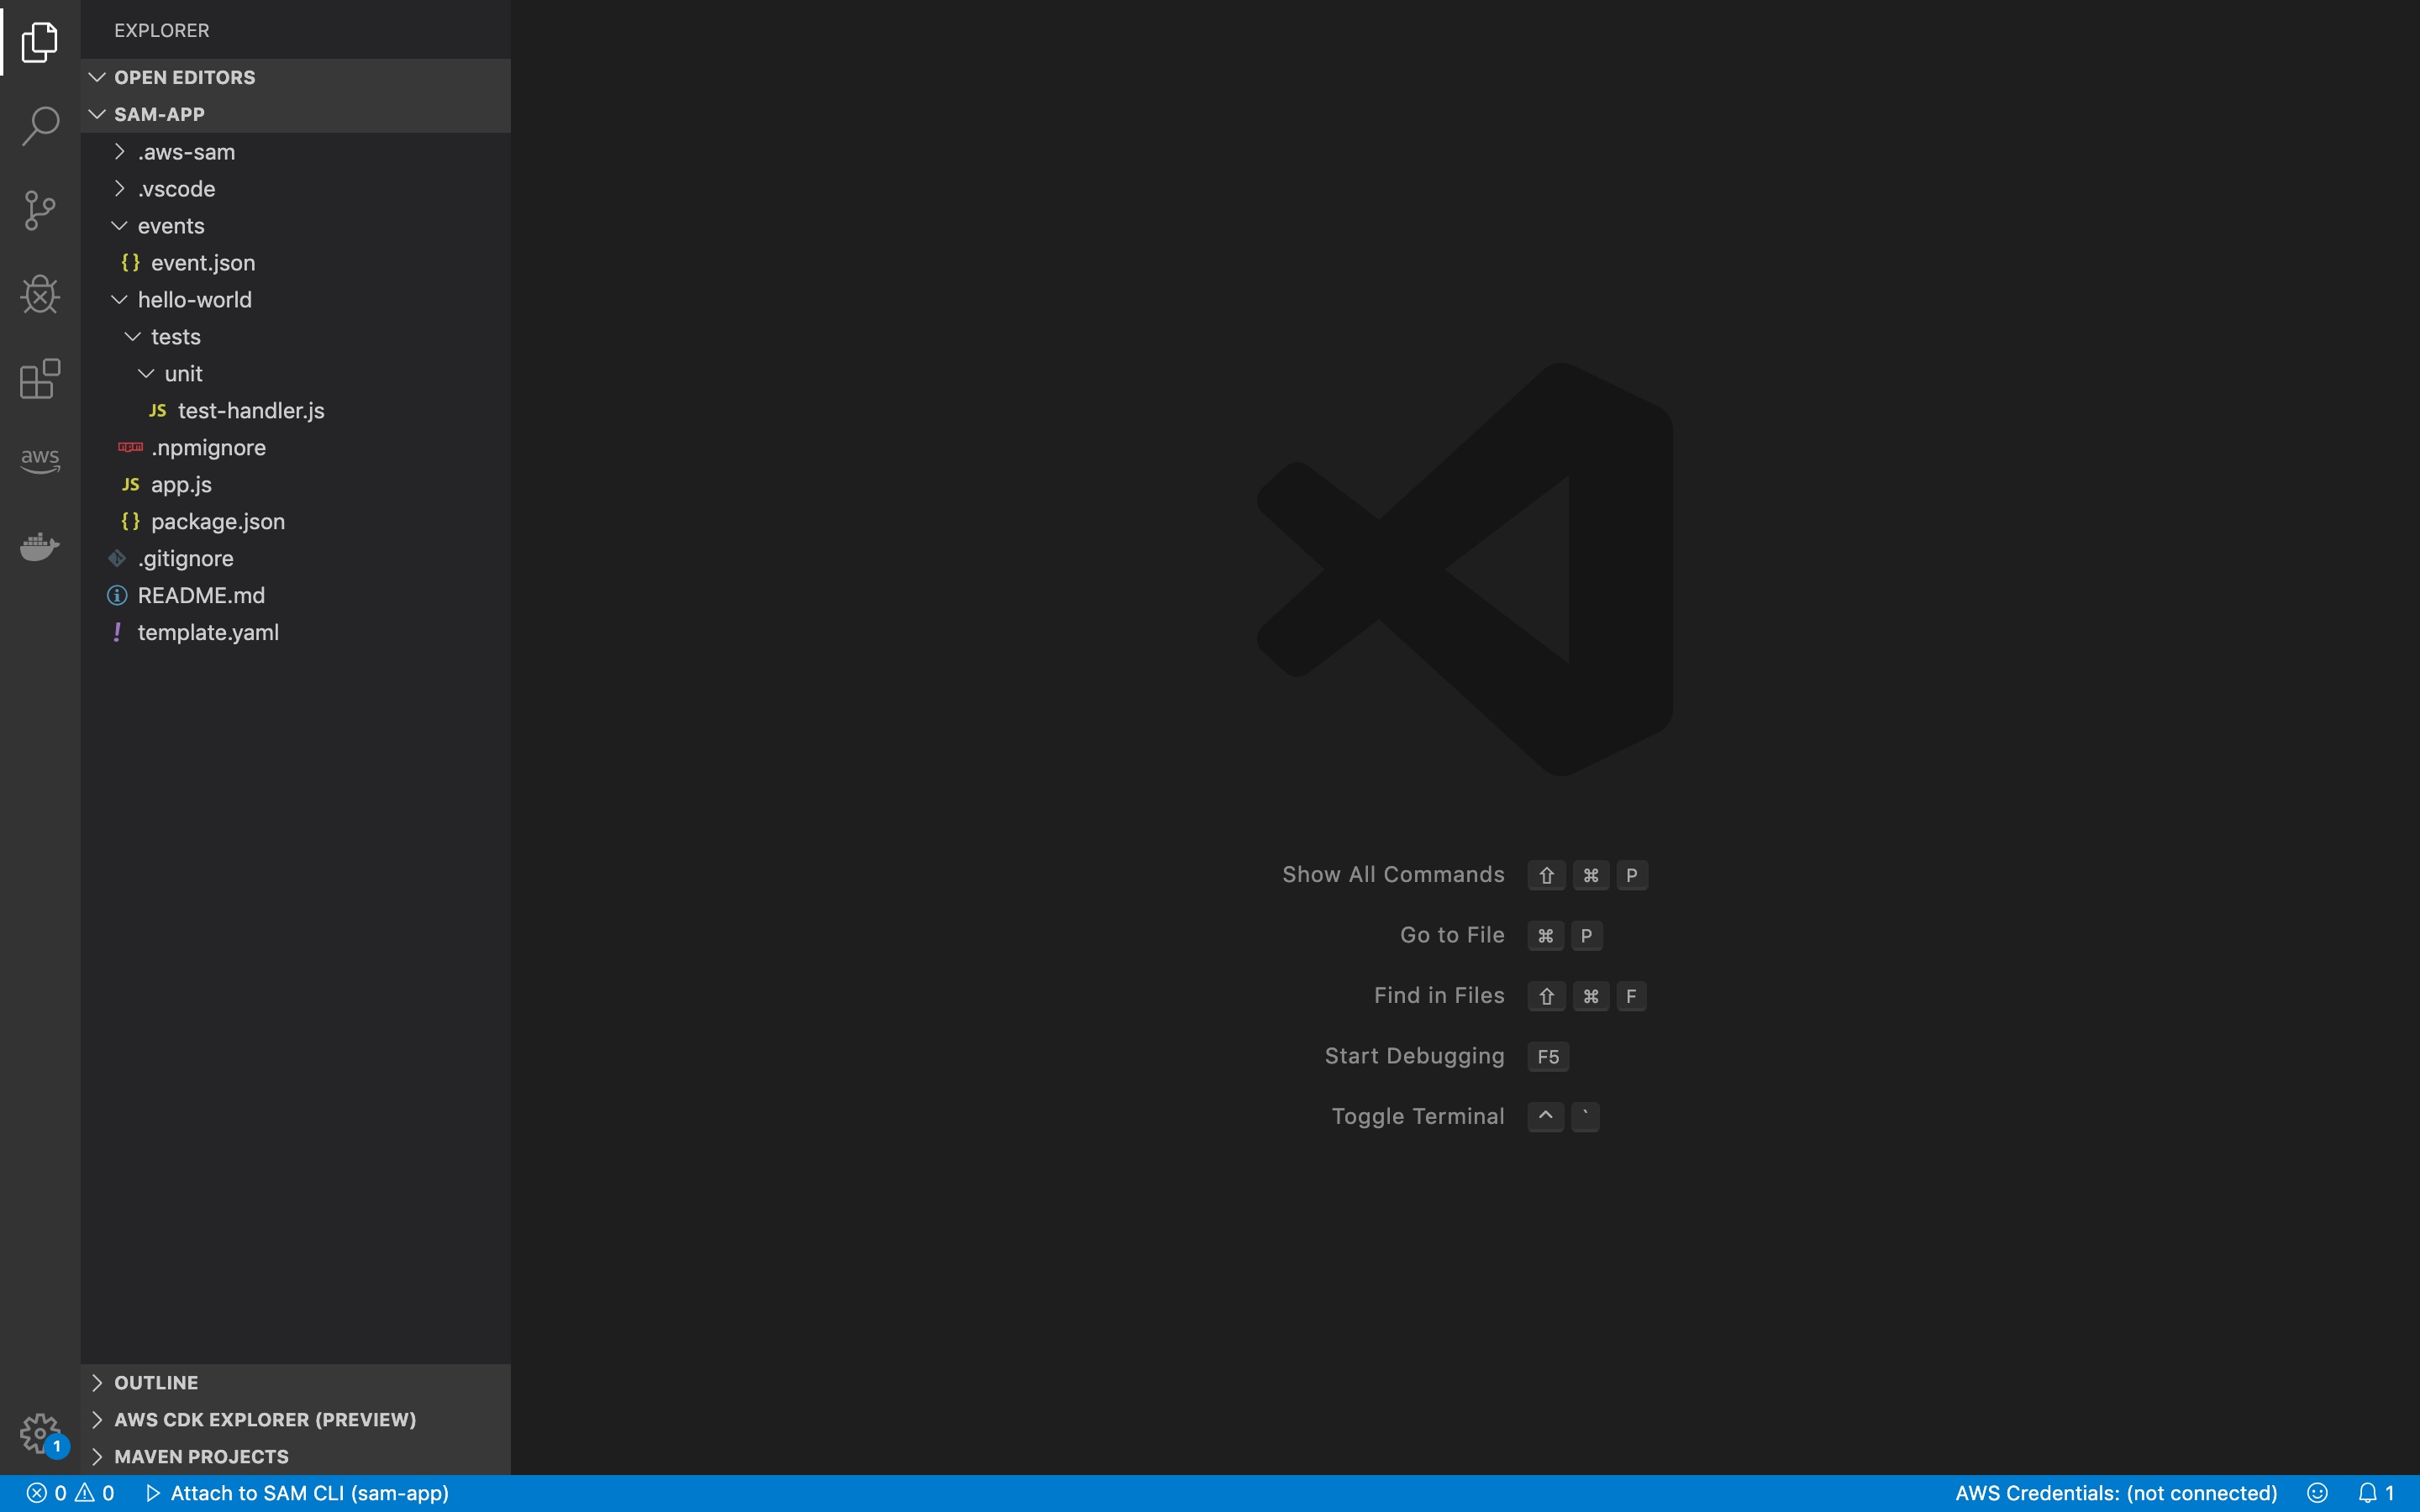
首先我们先在代码中打上断点,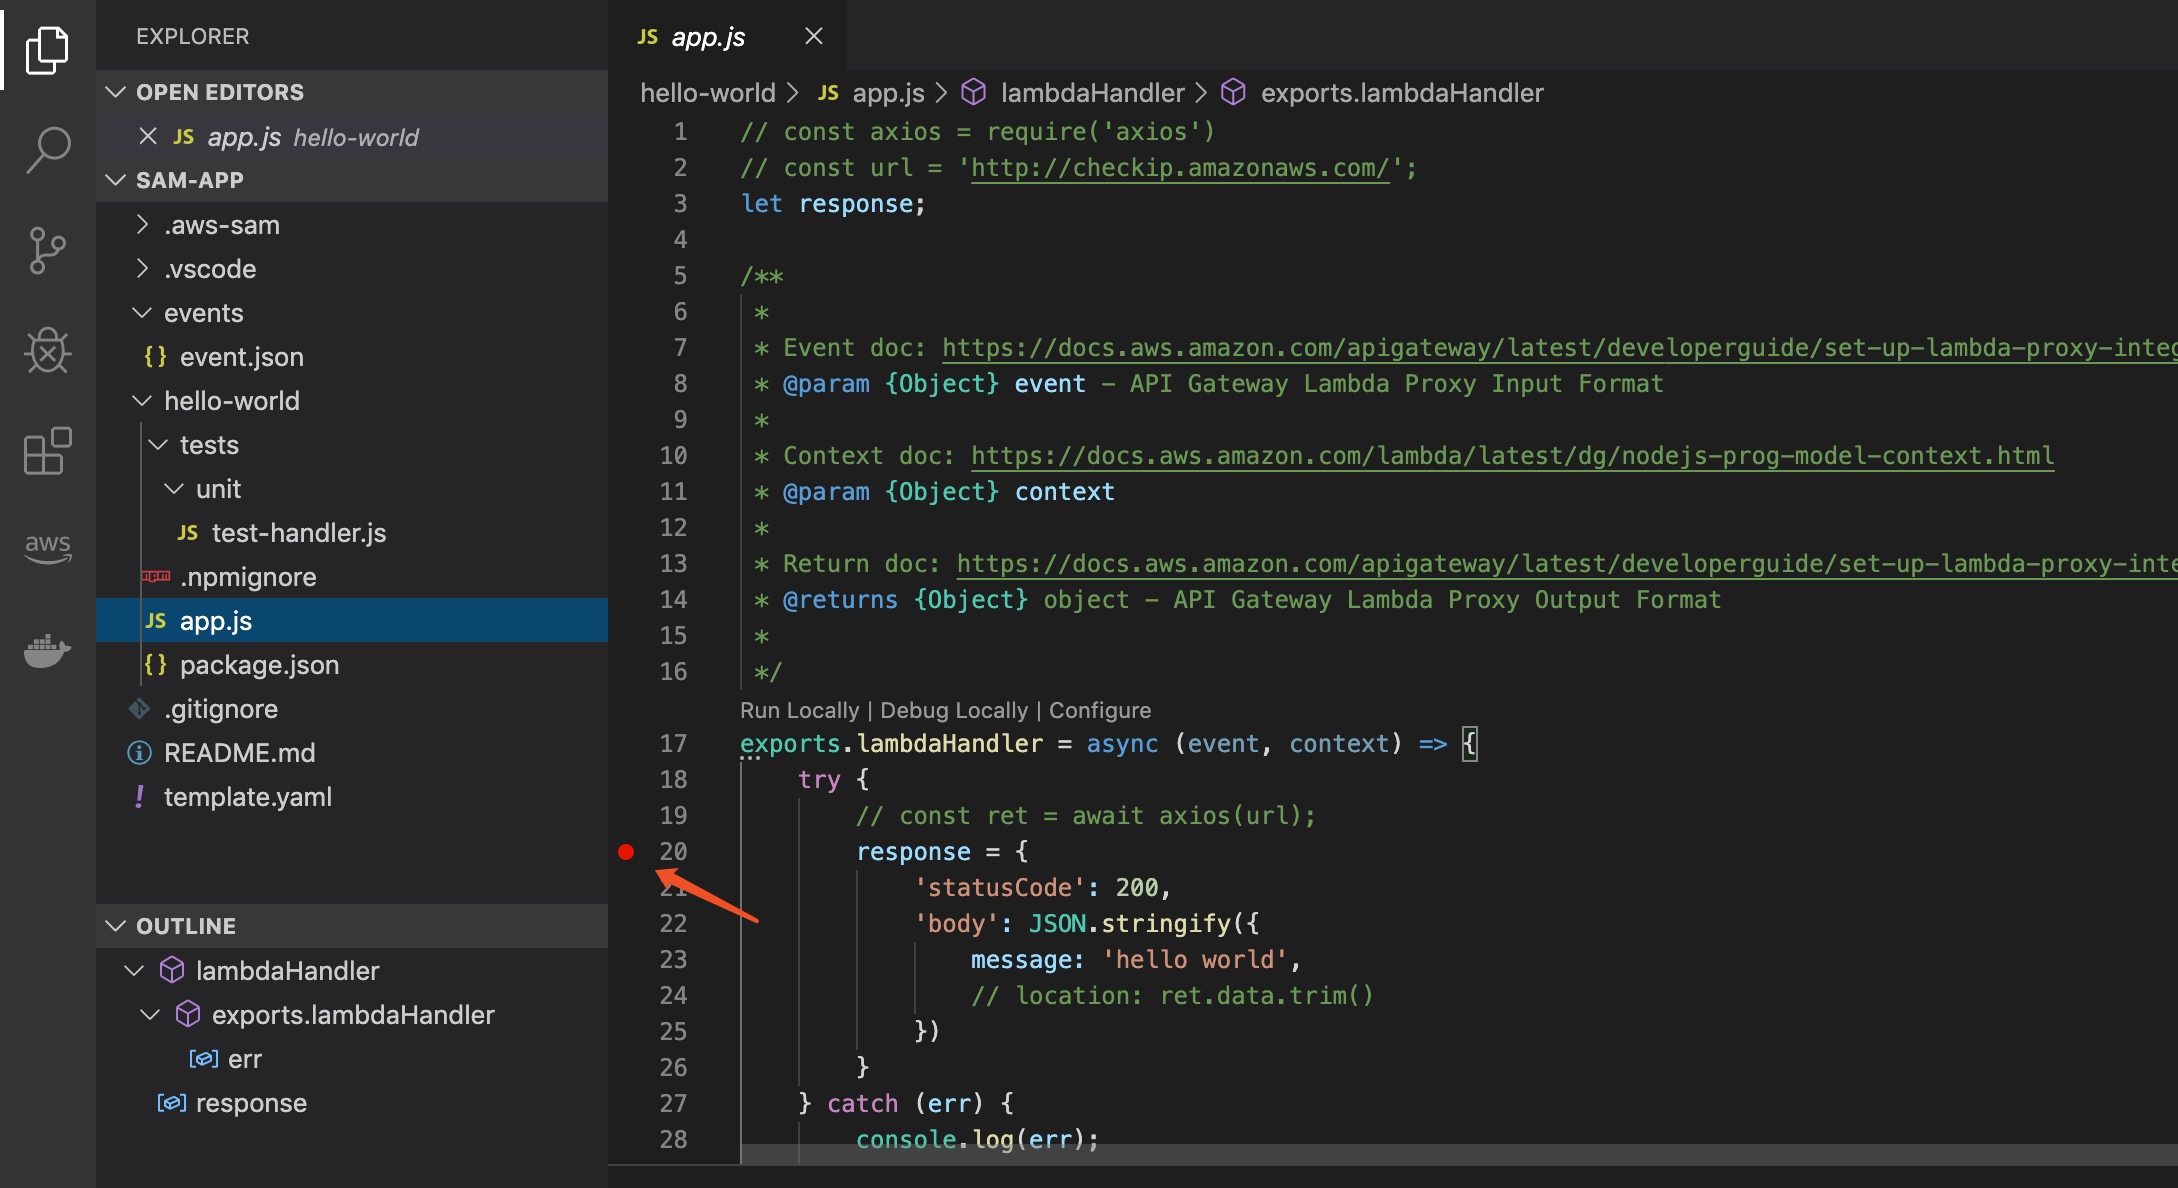
然后再使用如下命令启动项目:
    启动项目:
    $ sam local invoke -e events/event.json --debug-port=5858 HelloWorldFunction
    参数说明:
        -e :执行函数时,传入的event参数
        --debug-port: 调试端口号
        HelloWorldFunction 即为项目名称, 和yaml中对应。
如下图:

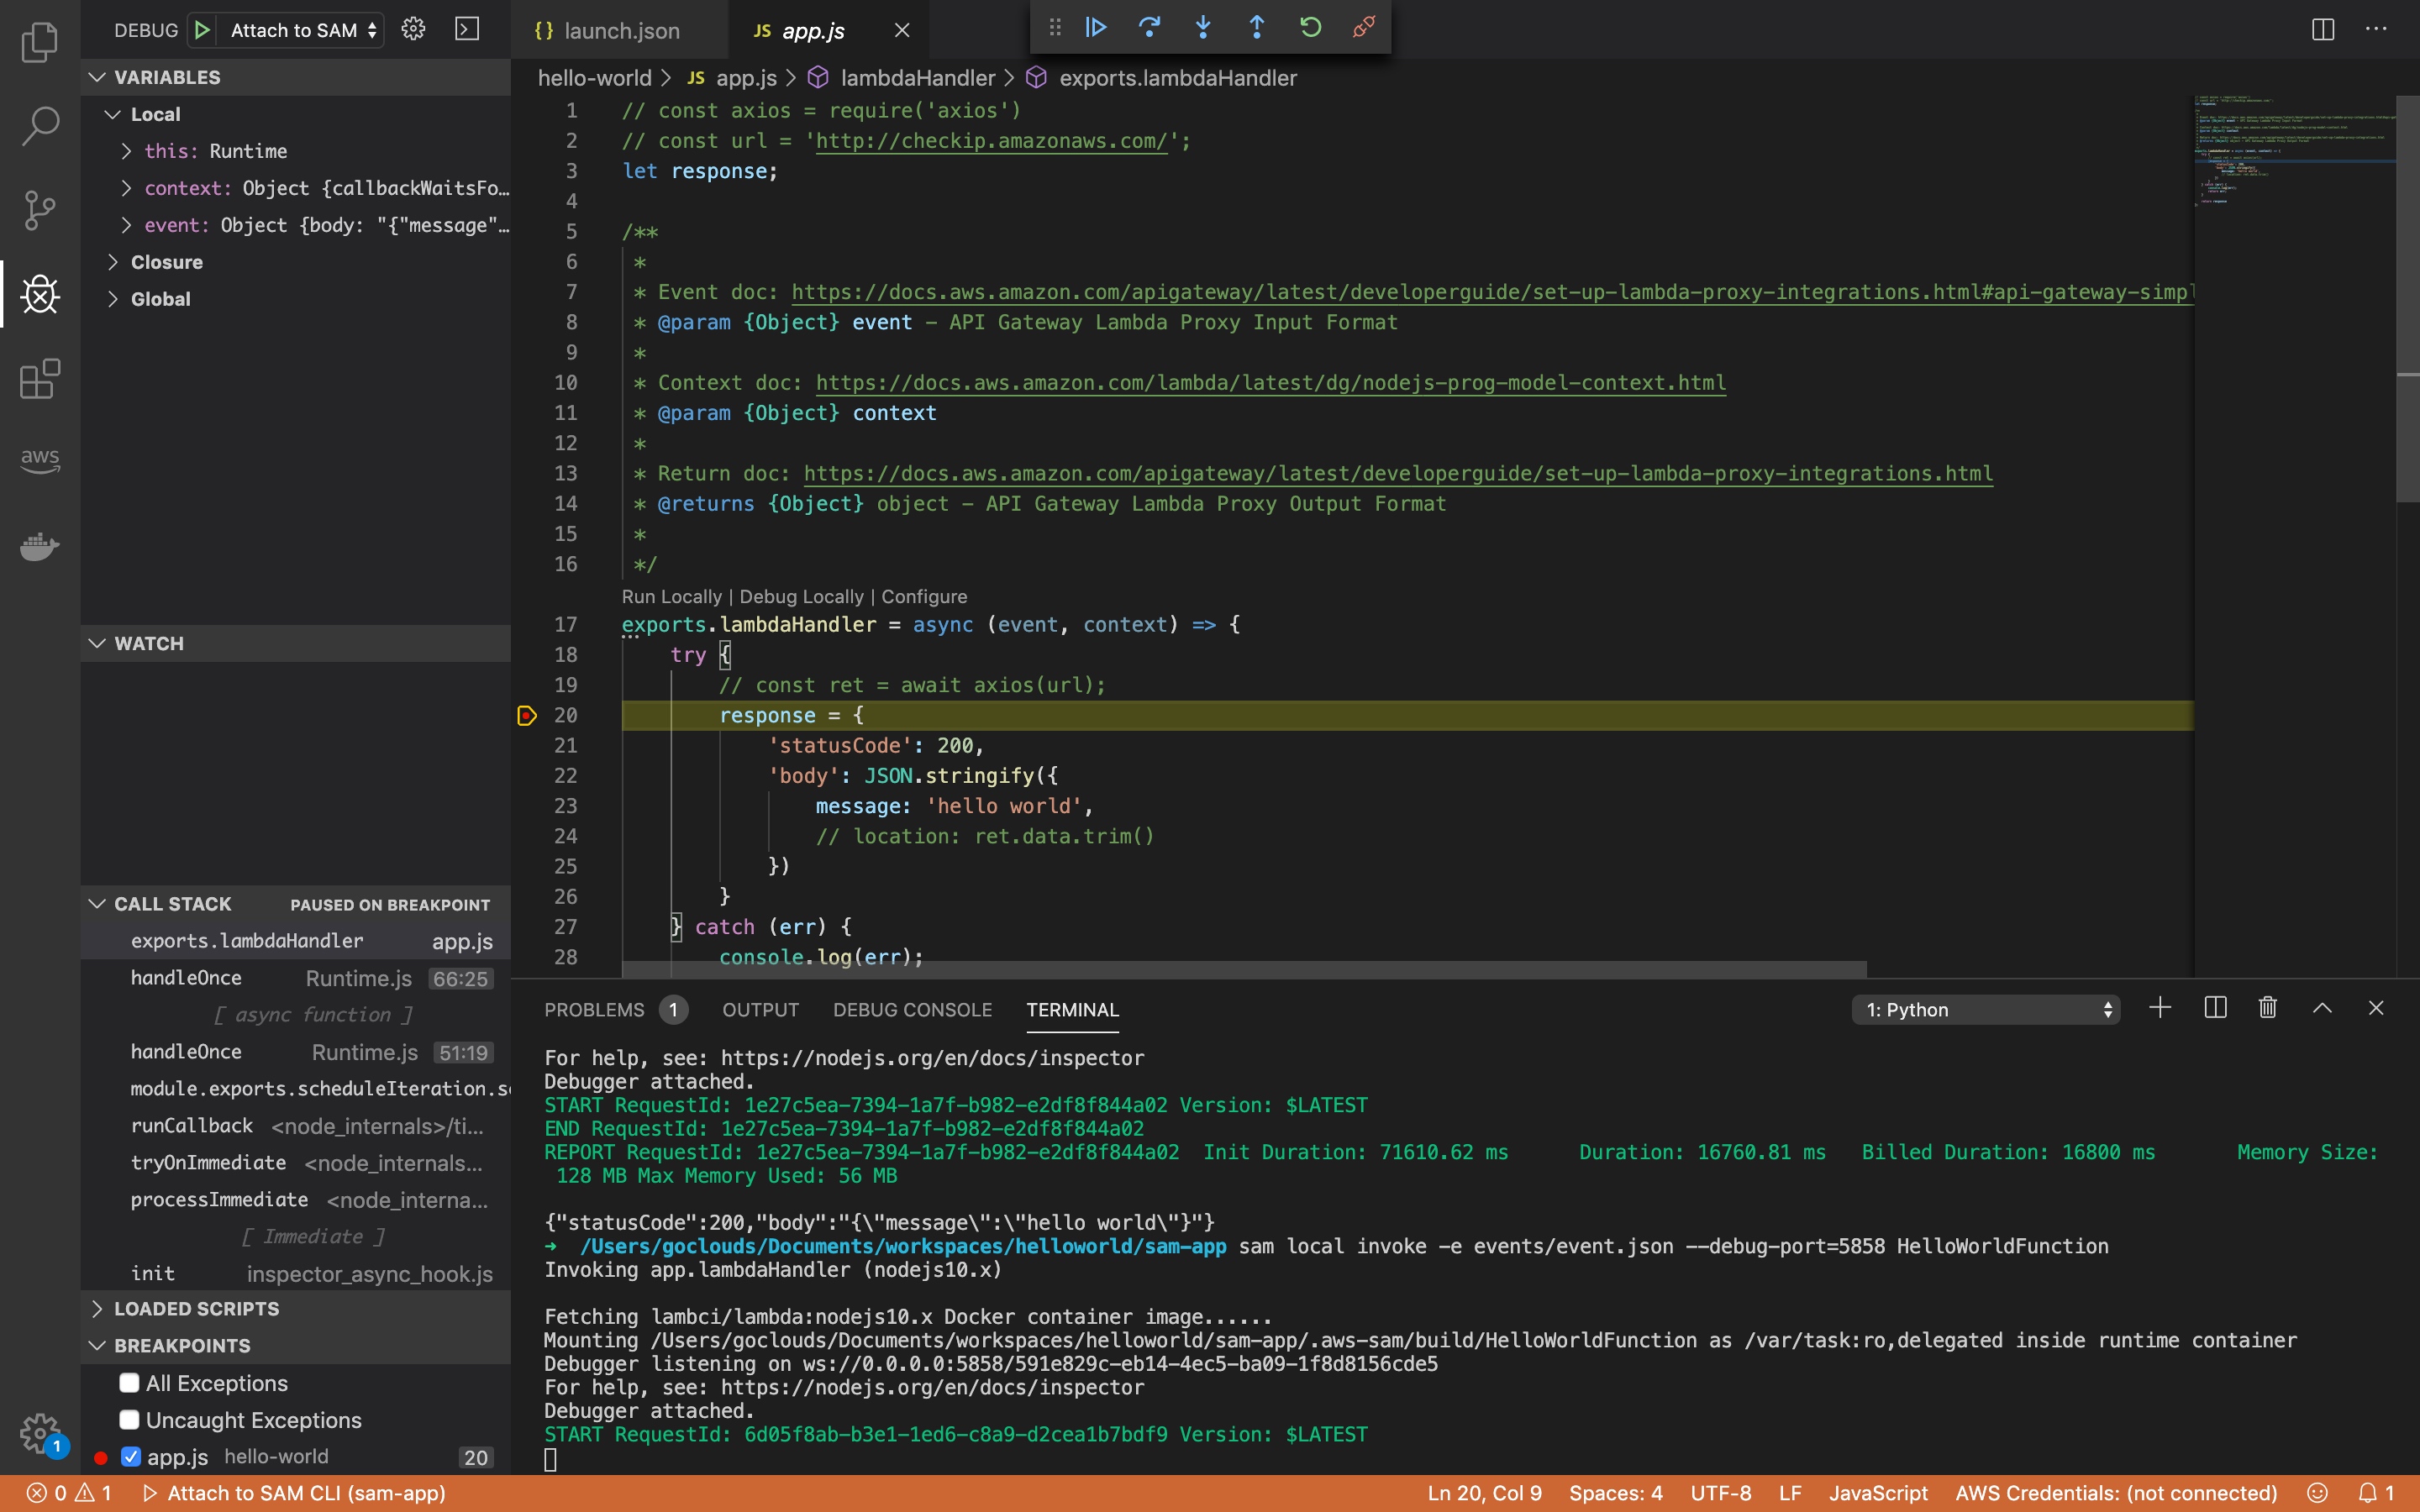
debug
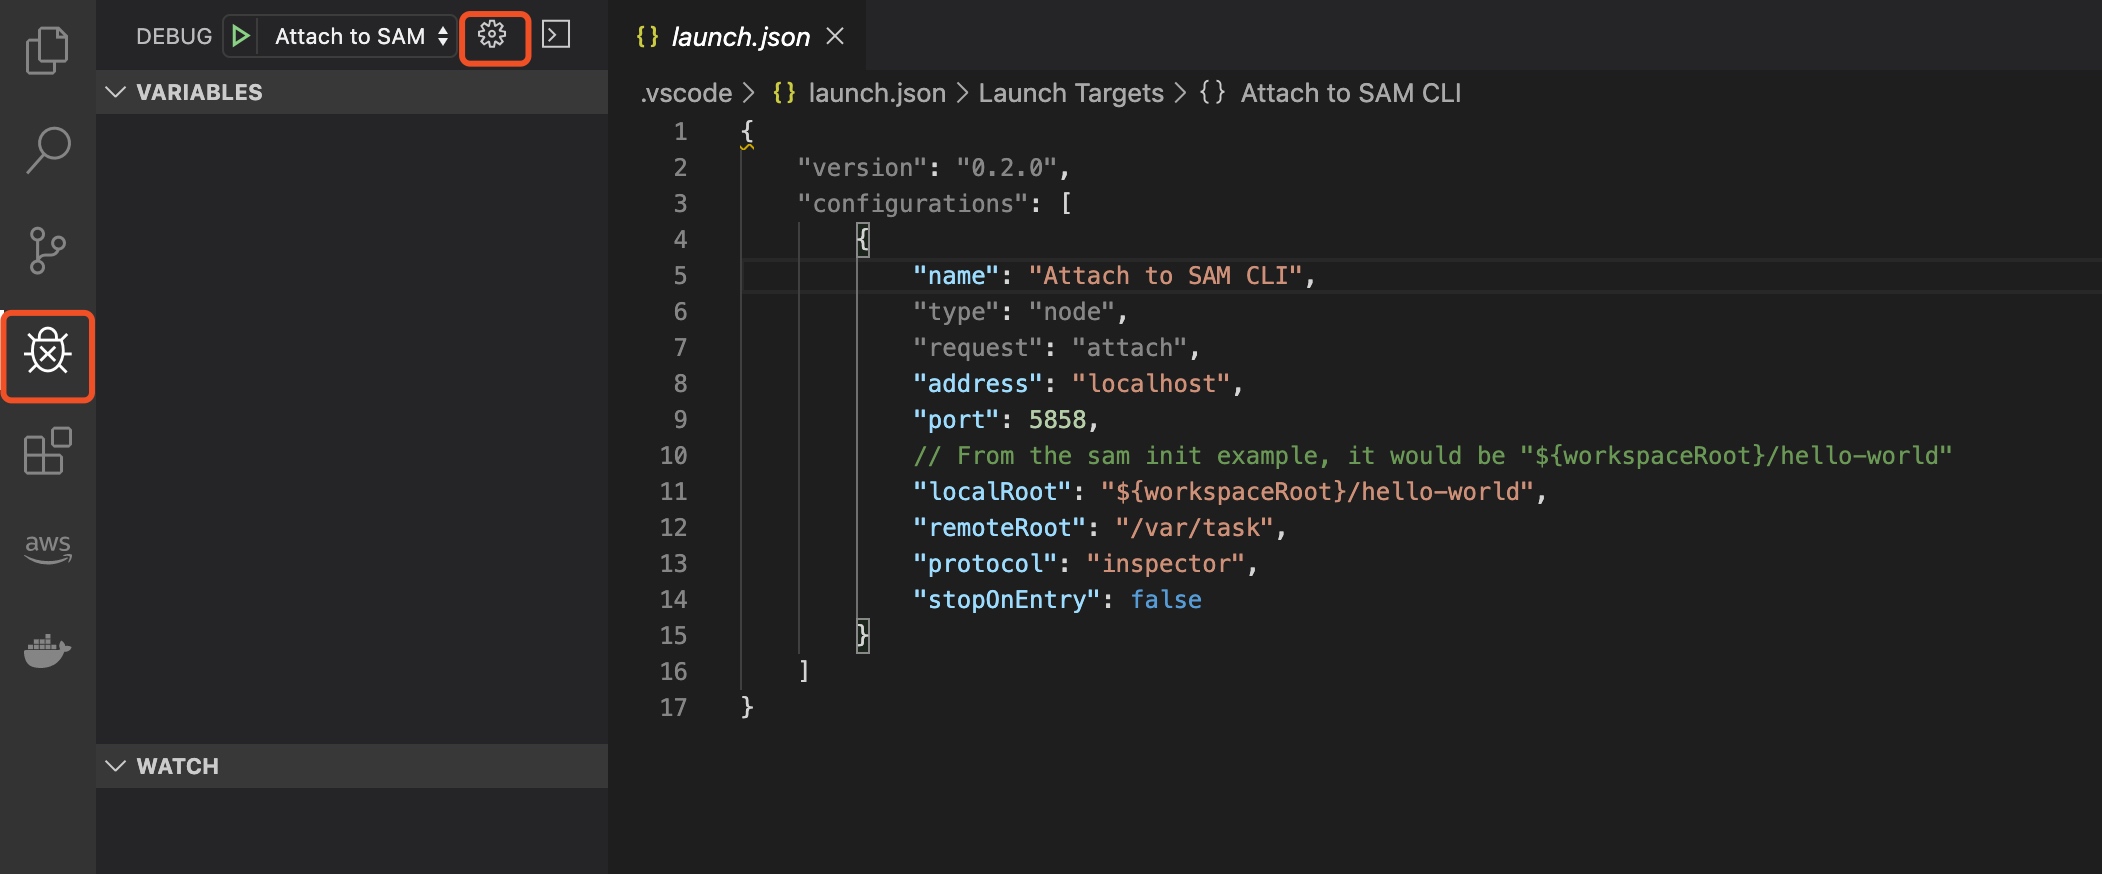
输入如下配置:{ "version": "0.2.0", "configurations": [ { "name": "Attach to SAM CLI", "type": "node", "request": "attach", "address": "localhost", "port": 5858, // From the sam init example, it would be "${workspaceRoot}/hello-world" "localRoot": "${workspaceRoot}/hello-world", "remoteRoot": "/var/task", "protocol": "inspector", "stopOnEntry": false } ] }
然后点击DEBUG按钮就可以进行调试